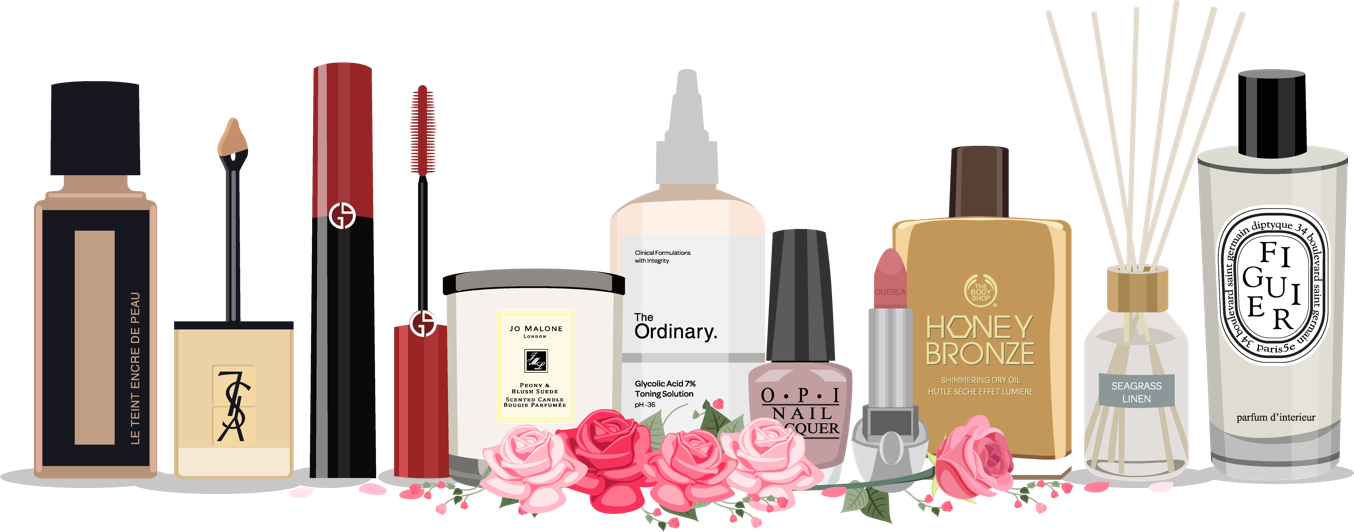
Everyone loves a trip to the nail salon for a good manicure – it’s relaxing, plus you get to enjoy a full set of fresh nails afterwards. But frequent visits to get your nails done can end up making quite a large dent in your wallet. So, to save you the hassle and the money, we’ve compiled a free easy guide to manicures at home. These self-care manicure sessions will leave you feeling pampered and relaxed, so settle in and give yourself some much-needed you time!
Although you may not be in your favourite salon, that doesn’t mean you can’t feel just as luxurious! Depending on the vibe you want to create, you can use loads of things you already have at home to create a pampering experience in your living room – light some candles, grab your softest towels, queue up a playlist of chill-out songs, or put on your favourite movie in the background while you set up your manicure tools and get ready to zen out.
There’s no way you can end up with the perfect manicure if you’ve still got last month’s nail polish on. Make sure all old polish is gone with a swipe of strong nail polish remover on a cotton pad over every nail – even if you don’t have nail polish on, this can help to cleanse nails really thoroughly and ensure you’re starting your manicure with a really clean base.
Now, this is the really relaxing part. Fill a large bowl or dish with warm water and gentle soap. If you’re experiencing dry skin on your hands after the harsh winter months, add in any kind of oil (we recommend olive oil to strengthen nails) to hydrate and soften your skin. Place your hands in the bowl and soak for ten to fifteen minutes. This will soften your skin and allow your nails to heal. As you soak, use a nail brush to ensure your nails are completely free of dirt and grime. If you have extra time, exfoliate with a sugar scrub to buff away any dead skin left on your hands.
Once you’ve dried your hands, use your favourite body moisturiser to hydrate your skin and allow it to soak into your skin for a good ten minutes. Make sure that you use this time to give yourself a hand massage to nourish your skin and improve circulation. If you want to go an extra step further, soak your nails in olive oil to repair any breakage and strengthen your nailbeds. Again, allow 10 minutes for your nails to absorb the oil, then wipe off the excess with a towel.
It’s time for the real manicure skills to come out. Firstly, push back your cuticles with manicure sticks, but be sure to go carefully – our cuticles protect your nailbeds and keep your nails strong, so don’t push too hard and don’t attempt to cut them. Treat them to a cuticle cream or, if you haven’t got any on hand, just massage in a small amount of oil again.
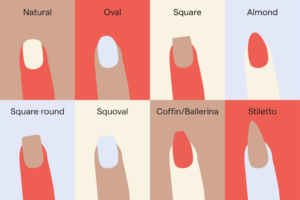
After your cuticles, cut and file your nails to your desired shape. If you’re looking to be practical or you’re a beginner, aim to just keep them short and uniform. If you’re a little more experienced, do some research and experiment with different shapes or lengths – an almond shape is always sleek and classy, while a stiletto shape is more daring and bold.
This is my favourite part; it’s time to add some shine by buffing those nails. Invest in a good nail buffer if you don’t already have one. It may seem easy to skip this step, but you’ll really notice the difference when it comes to applying polish. Buffing removes ridges and dirt in the nail, leaving a smooth surface. Buff gently until you see a shine on every nail. But make sure to not get carried away and over-buff; too much buffing can weaken your nails and cause breakage at the nailbed.
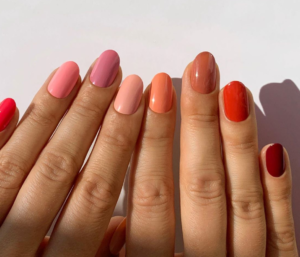
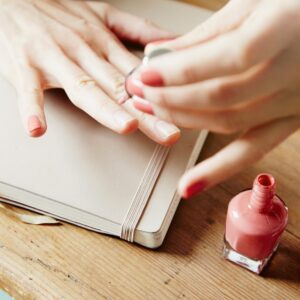
Finally, it’s time for the polish! You can apply a base coat if you have one to hand, but if you have done sufficient nail prep, you should be able to achieve a salon-worthy manicure without it. Pick out your favourite polish and go to work applying your first layer. If you’re using quite a sheer polish, you’ll likely need at least two coats, if not more. If you’re ready to take it a step further, have a go at some exciting designs or varying shades to make your nails even more eye-catching.
Go slow and steady if you’re not used to painting your own nails, and correct your mistakes with a cotton bud and some nail polish remover once you’ve finished. Top tip – if you’re feeling unsure, always apply thin layers of polish. You can build up colour steadily, but too much polish at once can become a big mess that will leave you frustrated.
Now you’ve finally finished applying your desired amount of polish, you’ve got to lock in the colour with a top coat. After all your hard work, it might seem like an unnecessary step to apply your top coat, but trust me, you’ll notice the difference in the following days if you choose to skip this step. This top coat from Sally Hansen is a game-changer for keeping your manicure going. This coat doesn’t need to be as neat and careful as the others, but it will add protection and shine to your nails that will allow it to last way longer than usual, so it’s worth it!

Now it’s time to chill out and just let your nails dry in their own time. If you’re unsure how long to leave them for, try not to rush – this is your chill-out time, remember? Give at least half an hour to touch dry, but avoid doing any intensive jobs with your hands; i.e., leave the washing up for someone else tonight! If you want to speed up the process a little, after 15 minutes of air-drying, dunk your fingers into a bowl of ice water to harden the polish super-fast. It might not be the most relaxing way to dry your nails, but it will get the job done fast!